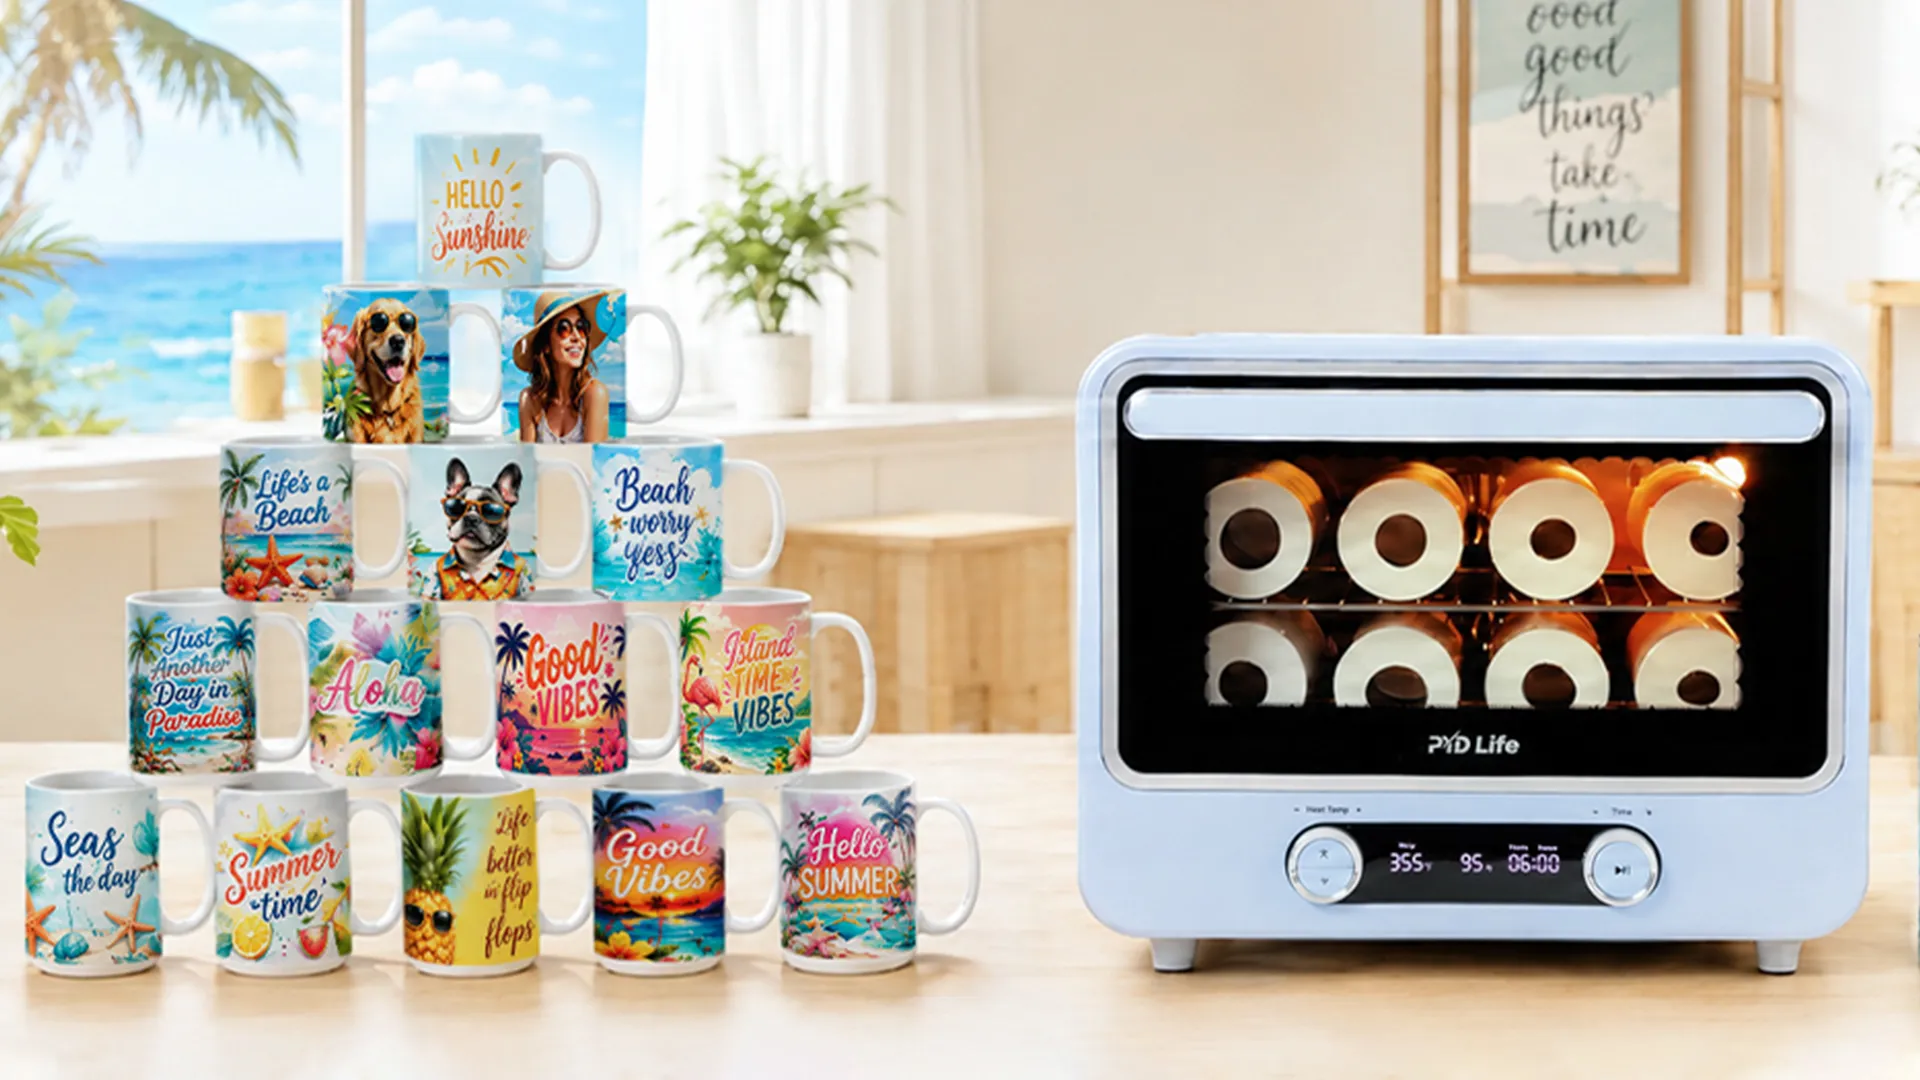
1.How to Make Perfect Full Wrap Sublimation Mugs with Sublimation Oven?
Have you ever wondered:
- What is the difference between full-wrap printing and partial printing?
- Why does a mug with a large blank area near the handle count as local or partial printing?
- What's the best way to avoid handle interference?
- How can you get vibrant, edge-to-edge results every time?
If you're creating personalized mugs for gifts, Etsy shops, craft fairs, or your own sublimation business, understanding the difference between full-wrap and partial printing is one of the most important skills you can learn.
A full-wrap sublimation mug is designed to cover as much of the printable surface as possible. By contrast, if there is a large blank space left near the handle, that is usually considered local or partial printing rather than a true full wrap.
Unlike standard mug printing, a full-wrap sublimation mug requires careful preparation around the handle area to ensure maximum image coverage without wrinkles or transfer issues.
In this guide, you'll learn exactly how to create a professional-quality full-wrap sublimation mug using a sublimation oven.
2.What Is a Full Wrap Sublimation Mug?
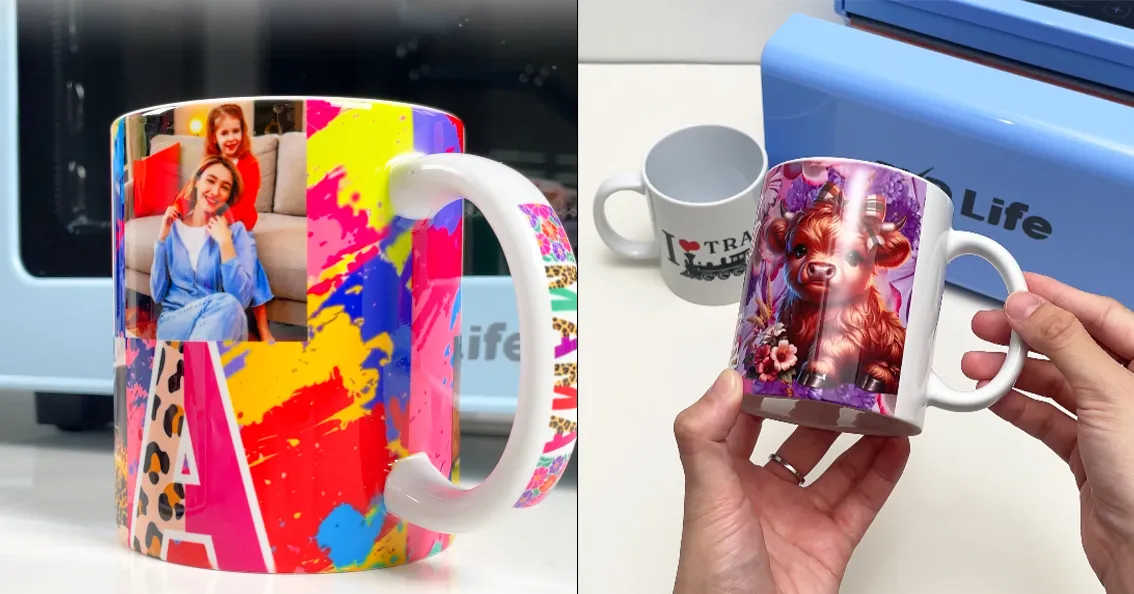
A full-wrap sublimation mug features a design that wraps around the entire mug, leaving only the handle area uncovered for a seamless and professional appearance.
Compared to standard mug designs, full-wrap printing offers:
✅ More printable area
✅ Better visual impact
✅ Professional retail appearance
✅ Higher perceived value
The challenge is finding a way to work around the handle without creating white gaps or wrinkles.
3.Why Use a Sublimation Oven Instead of a Mug Press?
Many beginners ask:
"Can I use a mug press instead?"
No, because a mug press has limitations in printing coverage, especially when you're trying to achieve a true full-wrap design.
A sublimation oven provides:
- Ability to process multiple mugs at once
- Better flexibility for different mug sizes and shapes
- Better support for full-wrap designs that need more coverage near the handle
- More efficient production for small business batches
- More uniform transfer results on curved mug surfaces
For businesses producing larger quantities of custom mugs, a sublimation oven can significantly improve efficiency.
4.What Supplies Do You Need?
Before starting, prepare the following materials:
Essential Equipment
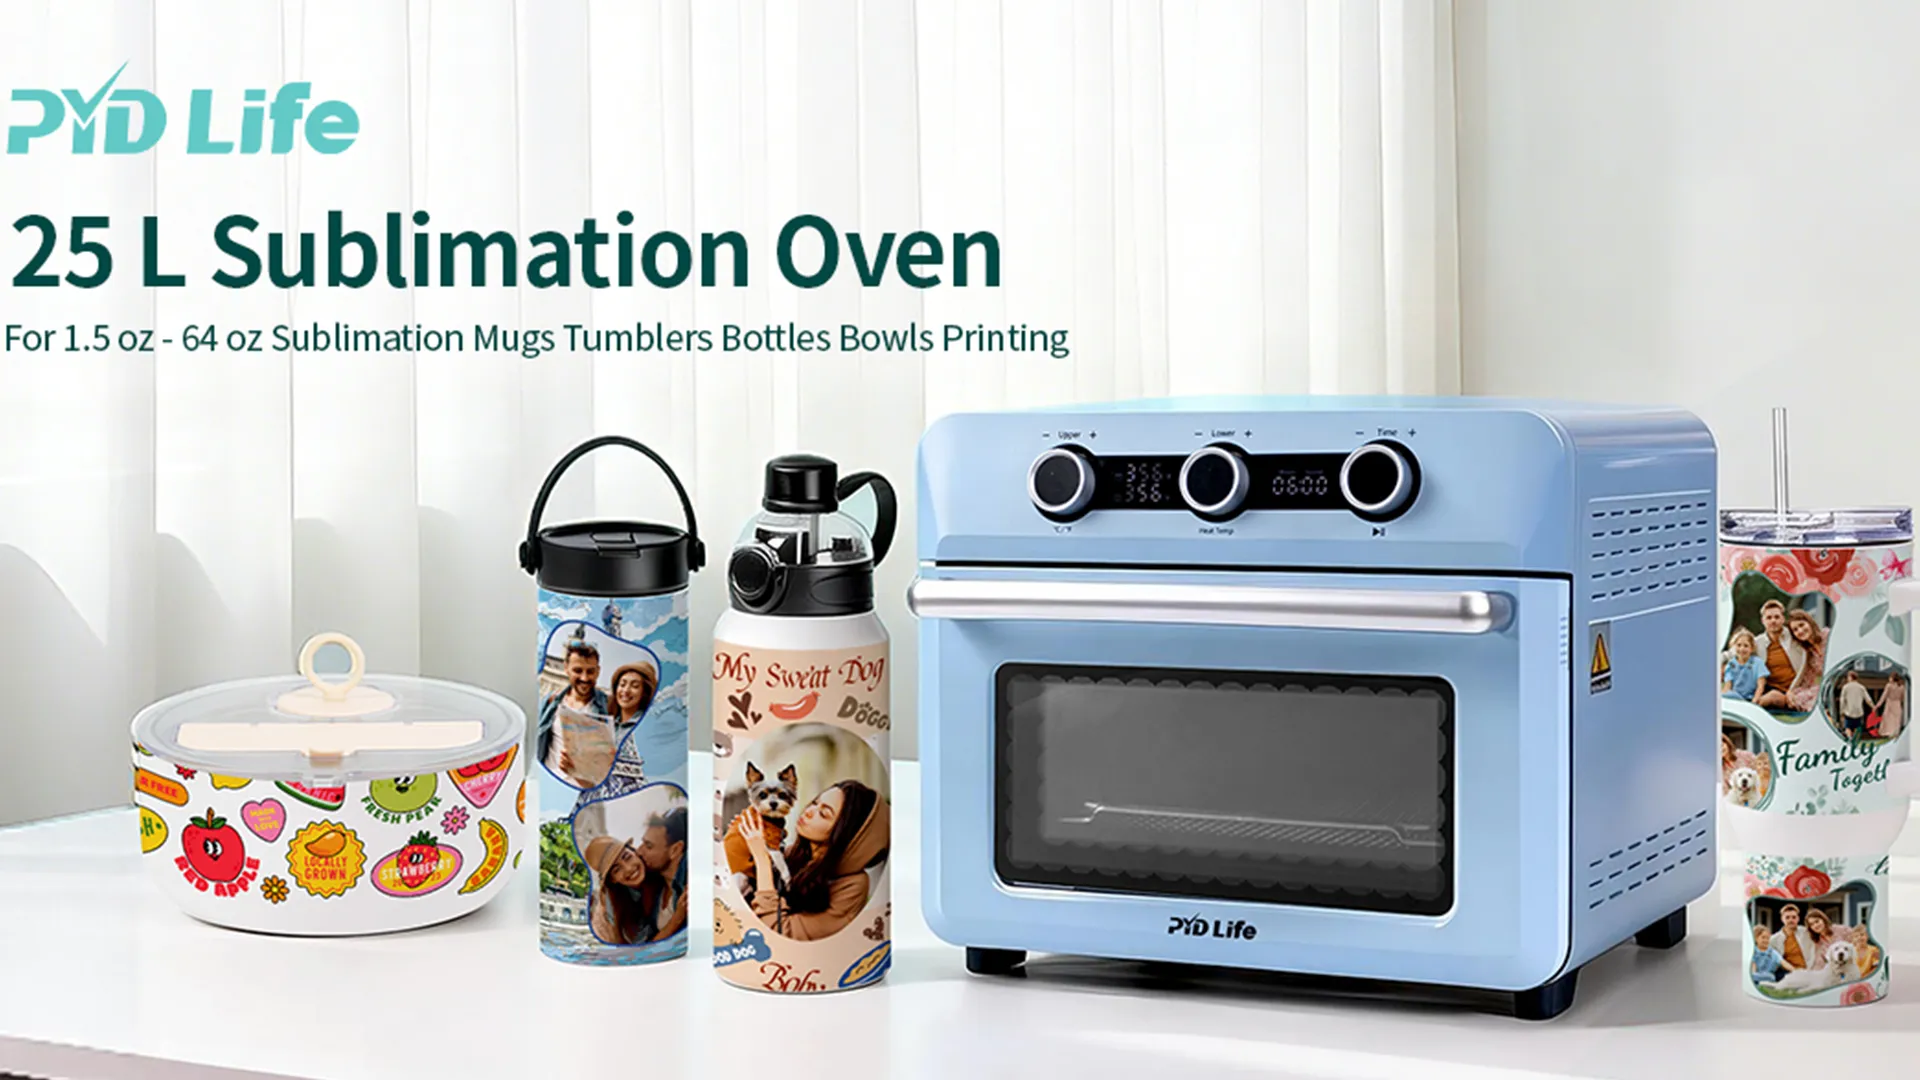
- Sublimation oven
- Sublimation mug blank
- Sublimation printer
- Sublimation ink
- Sublimation paper
- Heat-resistant tape
- Shrink wrap film
- Heat gun
- Heat-resistant gloves
Optional Tools
- Lint roller
- Alcohol wipes
- Mug cradle
- Design software such as Canva, Photoshop, or Illustrator
Preparation is one of the easiest ways to improve transfer quality.
5.Step 1: Create and Print Your Design
Before printing, ask yourself:
Is the Design Mirrored?
All mug artwork should be mirrored before printing.
Is the Design Large Enough?
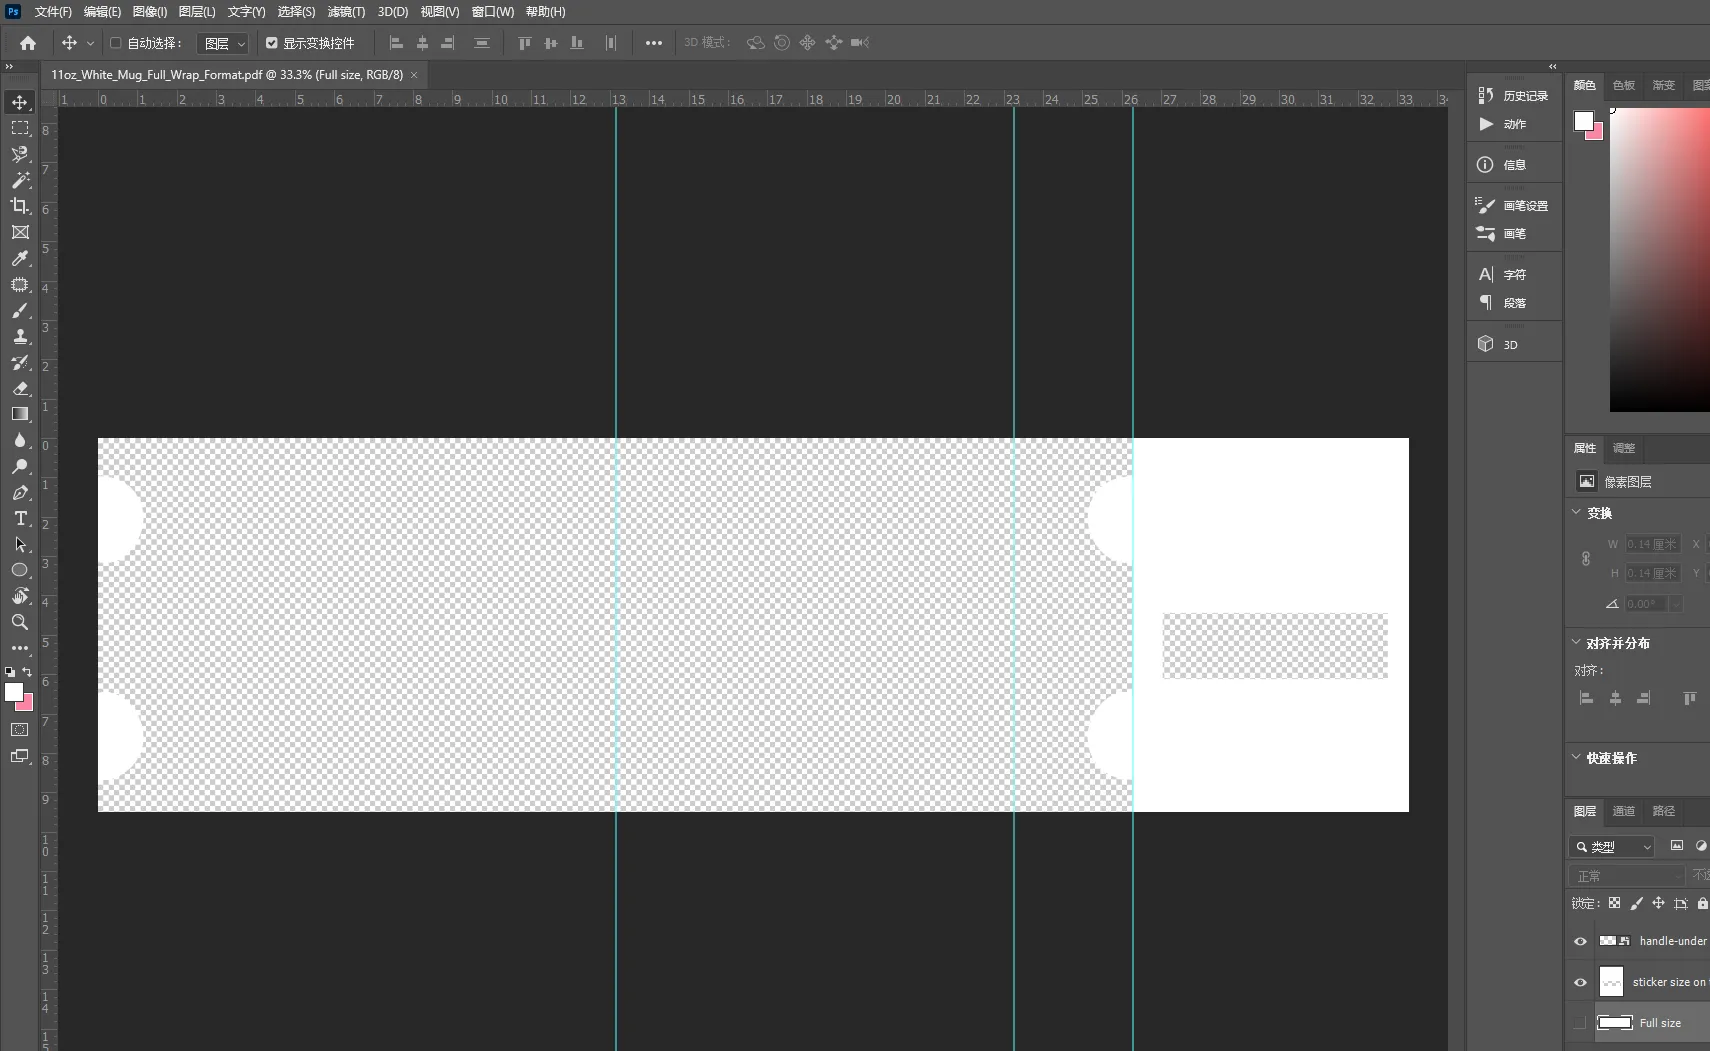
For a full-wrap mug, the artwork should extend slightly beyond the printable area.
Download our mug template here: Download the template. Open it in Photoshop to resize and align the artwork so it fits the mug properly.
This helps maximize image coverage near the handle.
Are You Using Sublimation Ink?
Only sublimation ink can permanently bond with the mug coating during heating.
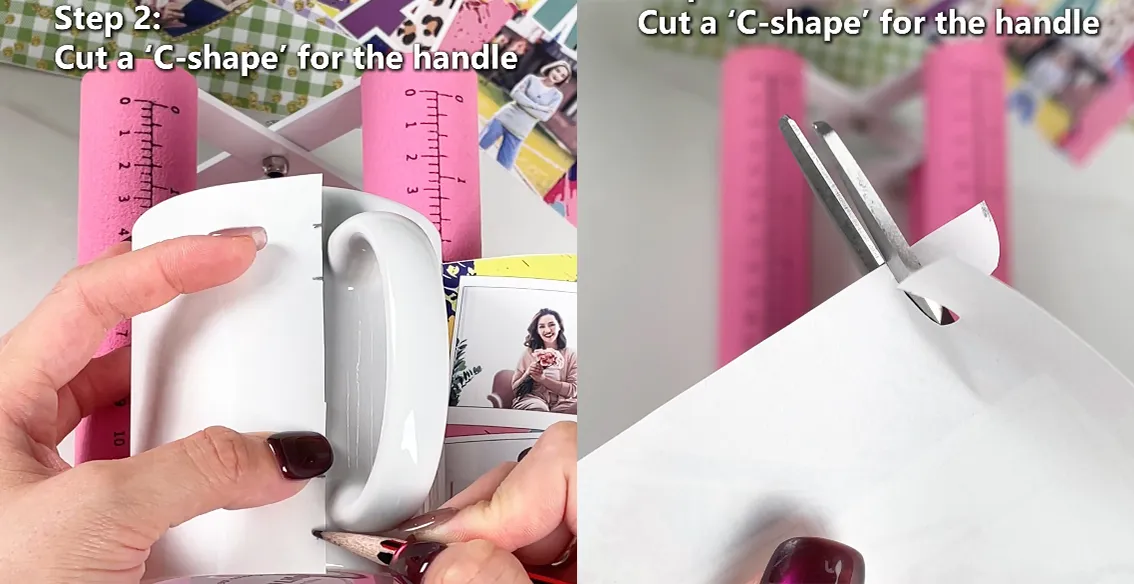
6.Step 2: Mark and Trim the Handle Area for a Full Wrap Design
This is one of the most important techniques for achieving a true full-wrap mug.
After printing:
- Wrap the printed transfer paper around the mug.
- Locate the exact position of the mug handle.
- Mark both sides of the handle location on the transfer paper.
- Remove the paper from the mug.
- Cut a small half-circle notch on each marked side.
Why Cut Half-Circle Notches?
The mug handle prevents the paper from lying completely flat.
Without trimming, it is difficult to achieve a true full wrap:
- Paper may wrinkle
- Pressure may become uneven
- Ghosting may occur
- Gaps can appear near the handle
By cutting matching half-circle notches on both sides of the handle area, the transfer paper can sit smoothly around the mug while still extending close to the handle.
The result?
✅ Better handle coverage
✅ Cleaner edges
✅ Reduced wrinkles
✅ A more professional full-wrap appearance
This simple technique is widely used by experienced sublimation makers to maximize printable space without sacrificing transfer quality.
7.Step 3: Secure the Transfer Paper
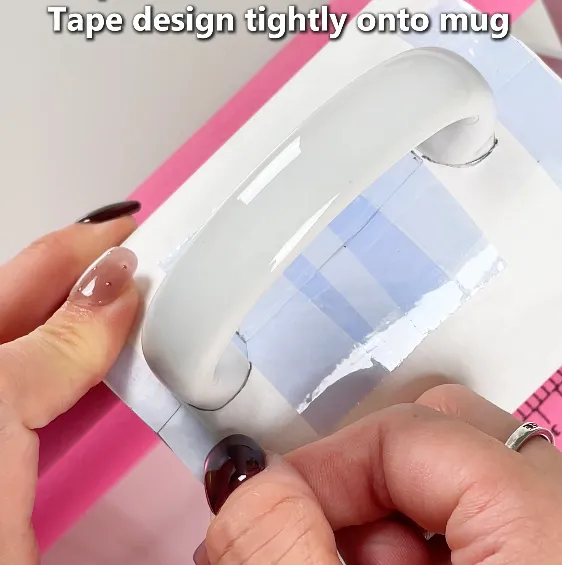
Once the handle notches are trimmed:
- Wrap the design tightly around the mug.
- Align the artwork carefully.
- Tape the seam securely.
- Tape both top and bottom edges.
Ask yourself:
Can the Paper Move During Heating?
If the answer is yes, ghosting may occur.
The tighter the paper fits against the mug, the sharper the final result.
8.Step 4: Customize the Mug Handle (Optional)
Did you know the mug handle can be sublimated too?
Many makers focus only on the body of the mug, but adding a design to the handle can create a more premium and personalized finished product.
To customize the handle:
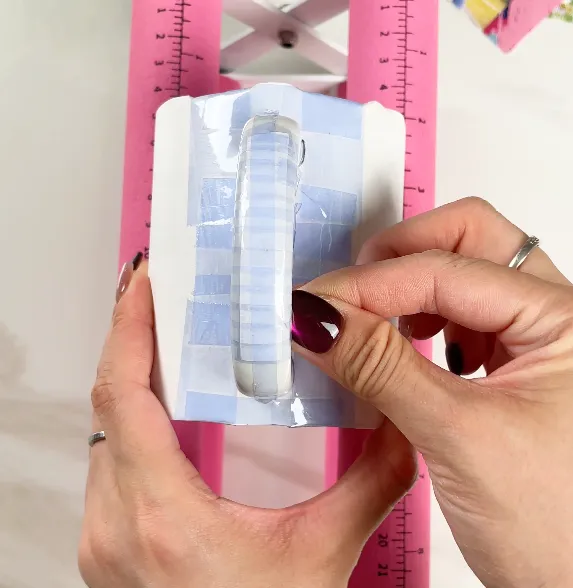
- Create a separate handle design that fits within the printable handle area.
- Trim the printed transfer to the appropriate size.
- Position the design carefully on the handle.
- Use heat-resistant tape to secure the transfer firmly against the handle surface.
Why Is Proper Taping Important?
The mug handle has a curved and narrow surface, making it easier for the transfer to shift during heating.
Before moving to the next step, ask yourself:
Is the Handle Transfer Secured Tightly?
Any movement during the sublimation process may result in blurred edges or double images.
A properly secured handle transfer can add a unique finishing touch and make your full-wrap sublimation mug stand out from standard designs.
9.Step 5: Apply Shrink Wrap Film
After securing the transfer:
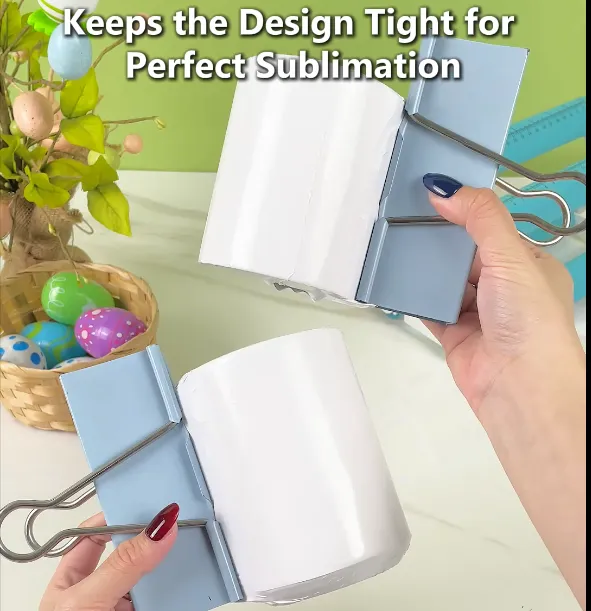
- Slide shrink wrap film over the mug.
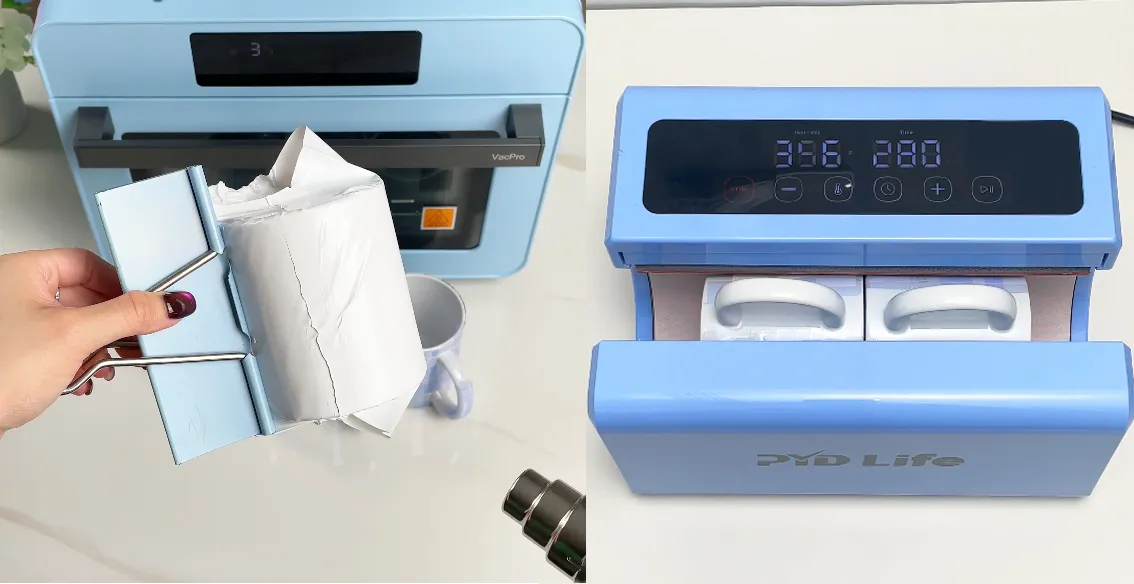
- Use binder clip to hold the mug handle while shrinking the film, which helps prevent burns and also reduces wrinkles in the film.
- Use a heat gun to shrink the film evenly.
- Ensure the film is tight across the entire surface.
Why Use Shrink Wrap?
Shrink wrap creates uniform pressure around the mug during baking.
Benefits include:
✅ Better image transfer
✅ Sharper details
✅ More consistent colors
✅ Improved edge coverage
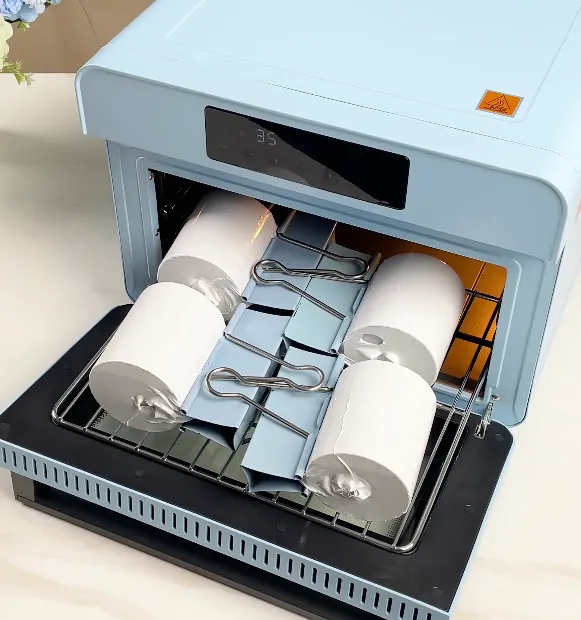
10.Step 6: Place the Mug in the Sublimation Oven
Once the mug is wrapped:
- Place the mug inside.
- Start the heating cycle.
Recommended Starting Settings
For one sublimation mug:
- Temperature: 356°F (180°C)
- Time: 12 Minutes
And for the bulk printing,we recommend setting 2-3 minutes longer than usual.
These settings may vary slightly depending on your oven and mug coating.
Testing is always recommended when using a new batch of blanks.
11.Step 7: Remove and Cool the Mug
When the timer reaches zero:
- Wear heat-resistant gloves.
- Carefully remove the mug.
- Remove the shrink wrap and transfer paper.
- Allow the mug to cool naturally.
Why Is Cooling Important?
Proper cooling helps preserve:
✅ Color accuracy
✅ Image sharpness
✅ Transfer stability
Removing the paper while the mug is still hot often produces the cleanest results.
12.Why Are There White Areas Near My Mug Handle?
This is one of the most common full-wrap sublimation questions.
Possible causes include:
Was the Handle Area Trimmed Correctly?
Improper trimming can prevent the paper from reaching the handle area.
Was the Paper Wrapped Tightly?
Loose paper often creates gaps near the handle.
Was Shrink Wrap Applied Evenly?
Uneven pressure may reduce image transfer around curved areas.
Using the half-circle notch method dramatically improves handle-area coverage.
13.Why Does My Mug Look Blurry?
Ask yourself:
- Did the transfer paper move?
- Was the seam taped securely?
- Was the shrink wrap tight enough?
- Was the mug overheated?
Most blurry images result from movement during the transfer process, but it can also happen if the temperature or time settings are not high enough.
14.Can You Start a Business Selling Full Wrap Sublimation Mugs?
Absolutely.
Customized mugs remain one of the most popular personalized products because customers use them for:
- Family gifts
- Company branding
- Teacher appreciation gifts
- Holiday gifts
- Wedding favors
- Coffee shop merchandise
- Promotional products
A professional full-wrap design often commands a higher selling price than standard mug decorations.