
1.How to Use H2C Pro Top and Bottom 2-in-1 Heat Press Machine?
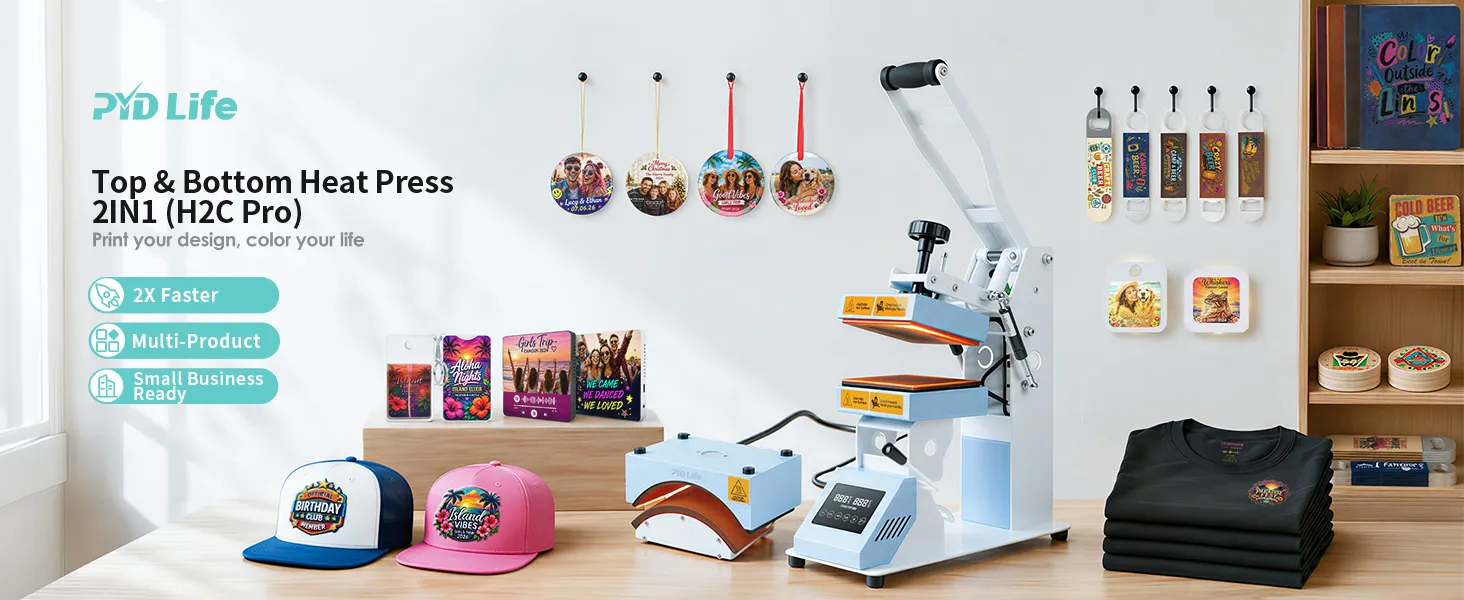
The H2C Pro Top and Bottom 2-in-1 Heat Press Machine is designed to make sublimation, DTF, HTV, and UV DTF projects faster, easier, and more consistent. With top and bottom heating press, one machine,two modes, it’s a powerful solution for both beginners and small business owner.
In this guide, we’ll walk through how to use the H2C Pro step by step, so you can achieve smooth, professional-quality transfers every time.
2.One Machine, Two Modes for More Possibilities
The H2C Pro is true 2-in-1 heat press machine, allowing you to switch between two working modes with one device. Whether you're customizing flat sublimation blanks or decorating hats and caps.
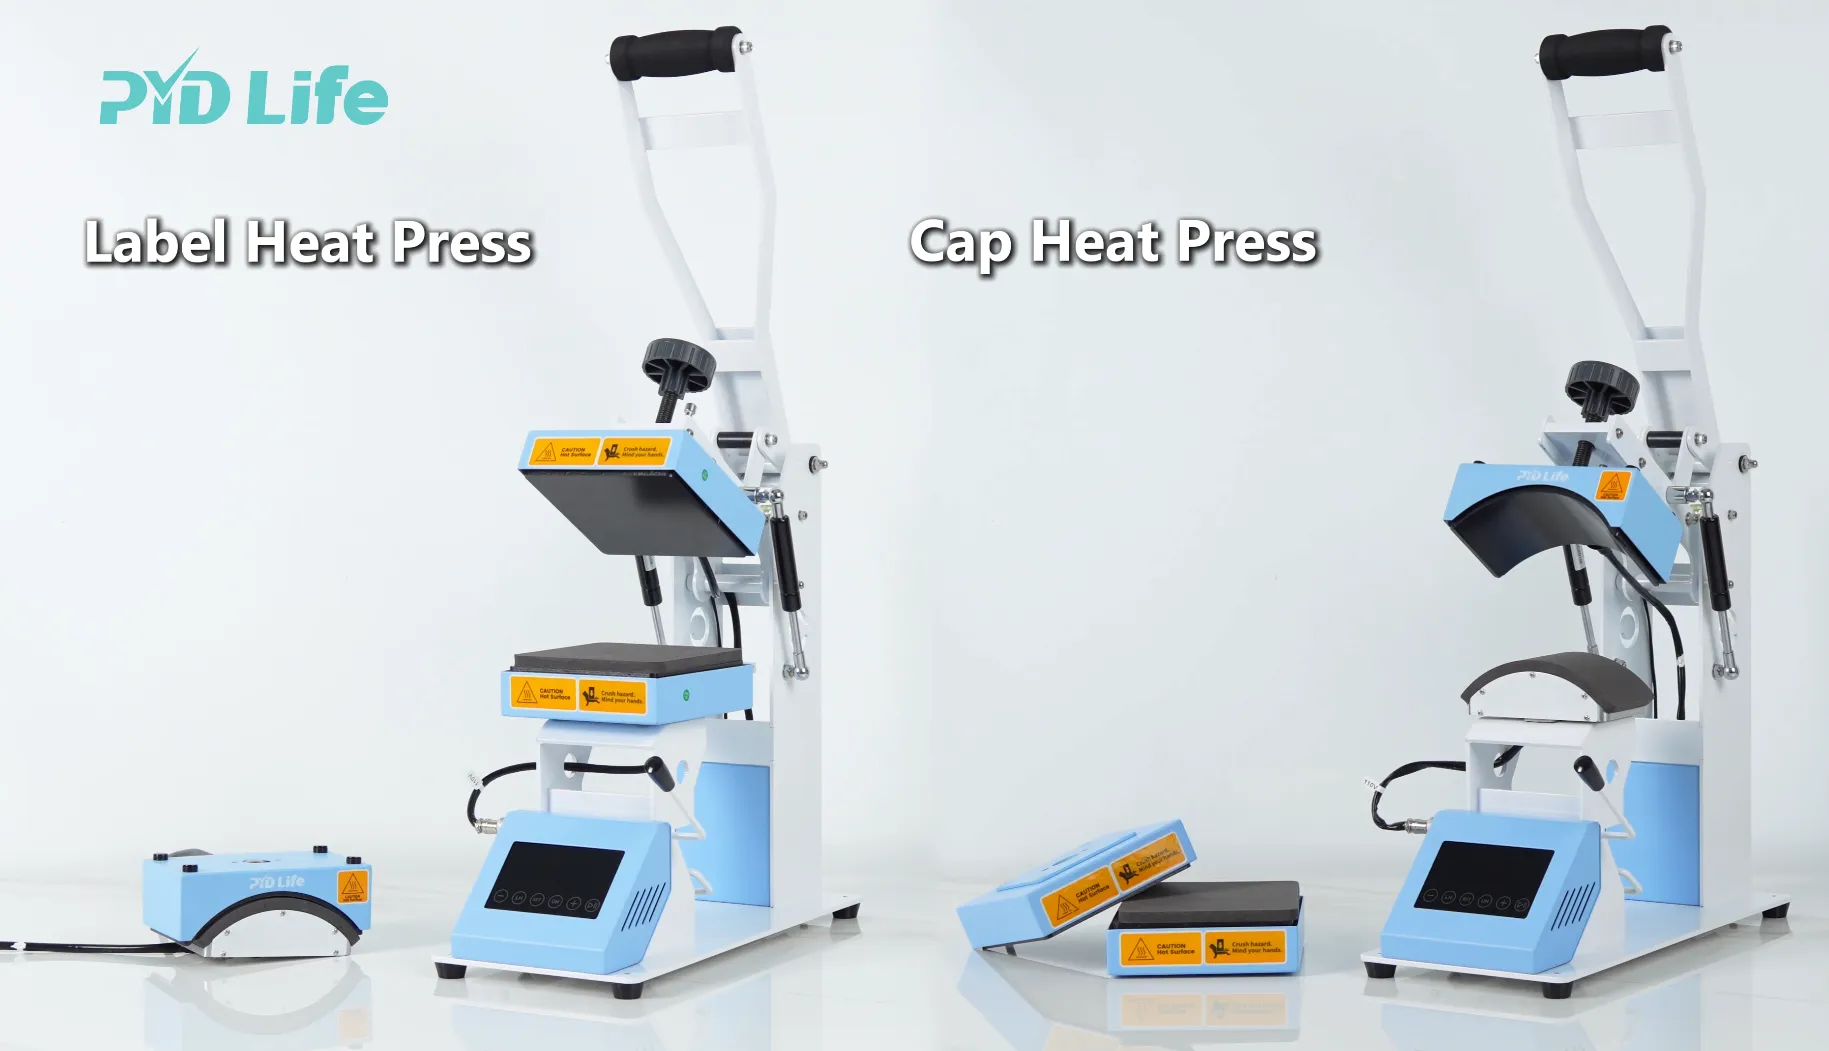
2.1.Mode 1: Flat Press (5.9” x 5.9”)
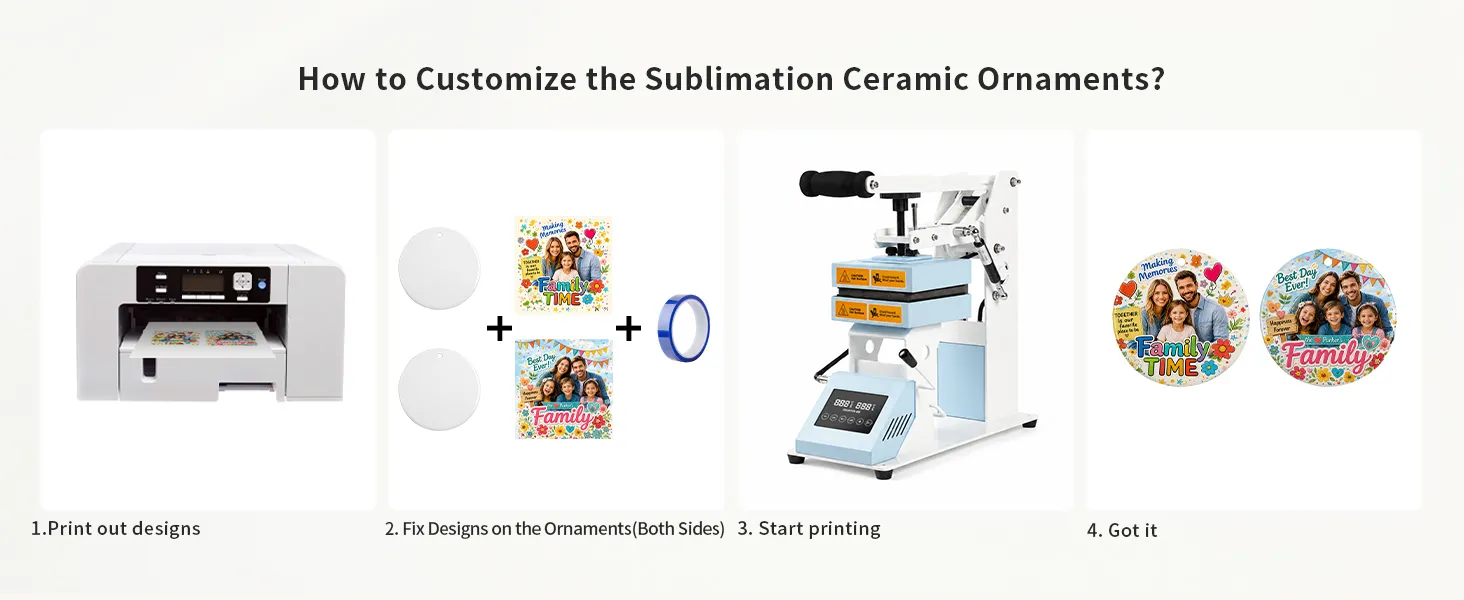
The flat press attachment features simultaneous top and bottom heating, delivering more even heat distribution and consistent transfer results.This is especially useful when pressing ceramic ornaments, as the dual-heating system ensures even heat distribution from both the top and bottom surfaces. With this machine, you can press two round ceramic ornaments at the same time, and complete double-sided printing.
Compared with traditional single-top heating machines, the H2C Pro delivers up to 2X faster production, with more stable and even heat distribution across the entire surface. This significantly reduces waiting time and improves efficiency—especially for double-sided printing sublimation blanks, helping you achieve vibrant, professional results in less time and with greater consistency.
<br/>
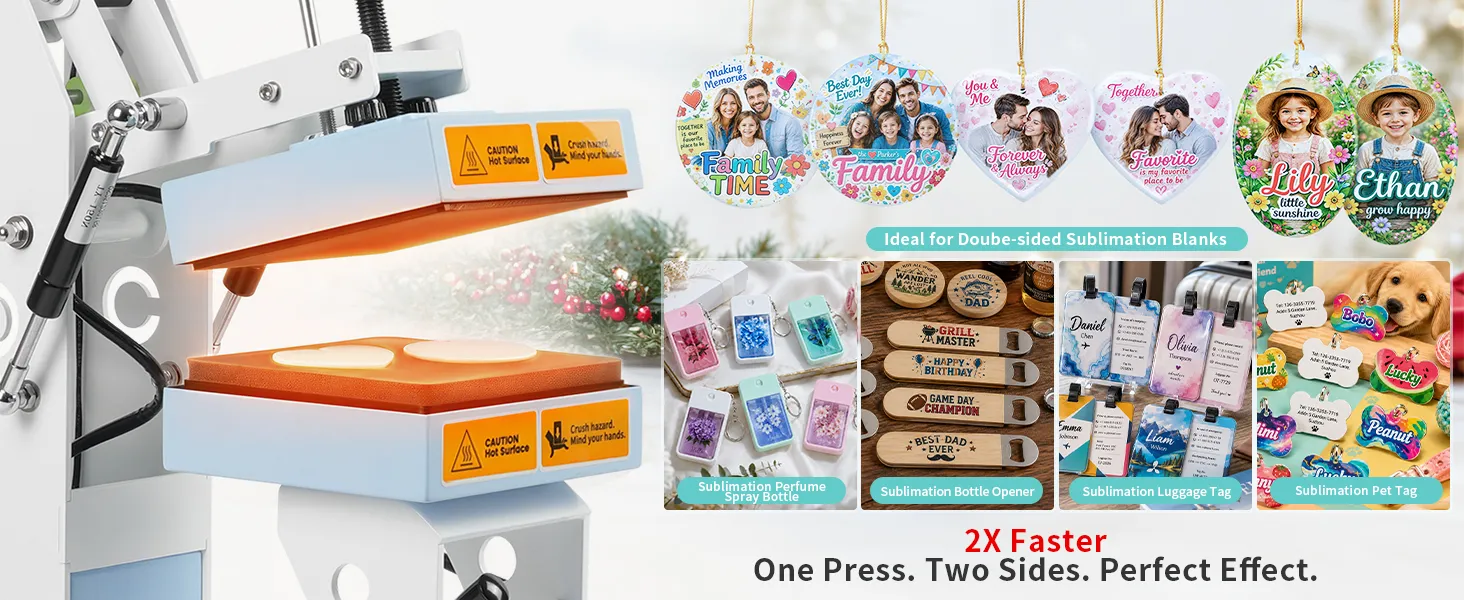
Perfect for small-format customization projects such as:
- 3D UV DTF logos on bags and T-shirts
- Sublimation card perfume spray bottle
- Sublimation night light
- Sublimation coasters
- Sublimation ornaments
- Sublimation Bottle Opener
- Sublimation tags
- Small photo slate
2.2.Mode 2: Hat Press
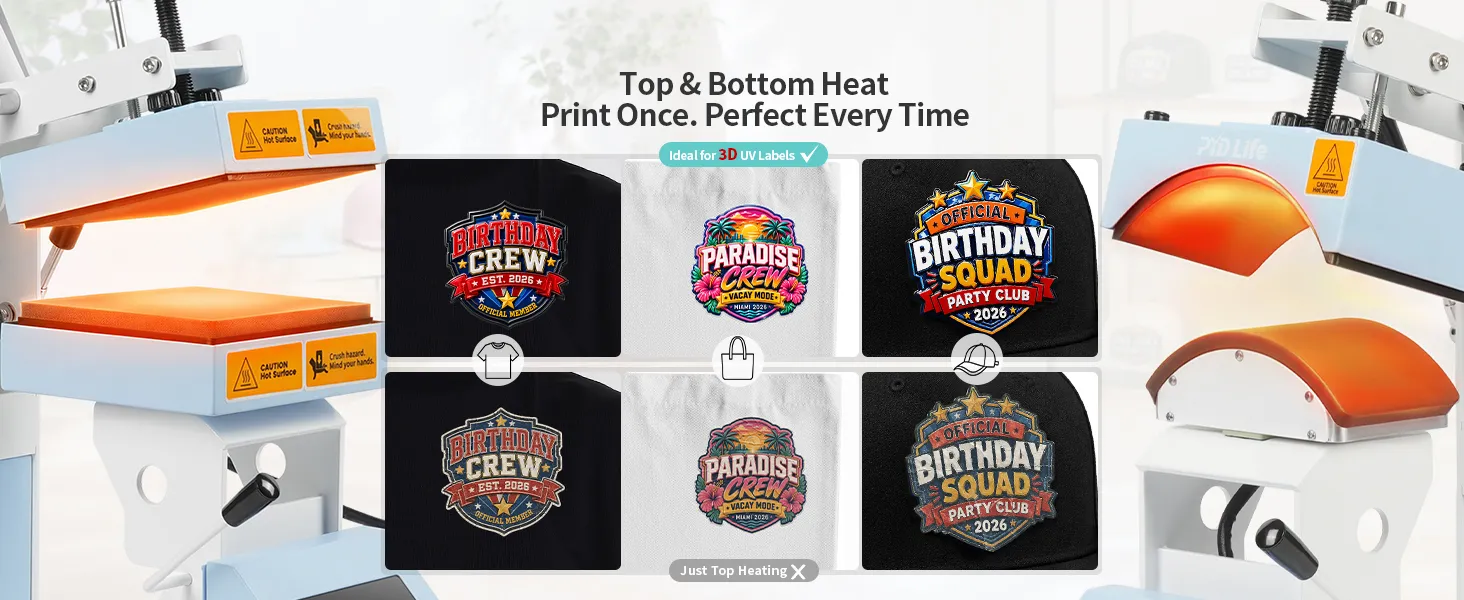
The hat press mode of the H2C Pro is designed for curved surfaces like caps, making it ideal for custom hats, embroidered patches, and 3D UV DTF logos.
What makes it different is its top and bottom heating system. Unlike traditional cap presses that heat only from the top, the H2C Pro applies heat from both sides at the same time, ensuring the adhesive layer is fully activated and evenly bonded to the cap surface.
This top and bottom heating improves adhesion strength and durability, especially for 3D UV DTF logos, silicone labels, and textured patches that require consistent heat penetration. It helps the transfer sit more securely on curved surfaces and reduces the risk of lifting or peeling over time.
In comparison, single top-heating machines may not provide enough uniform heat through the material, which can lead to weaker bonding and potential edge lifting or partial detachment during use.
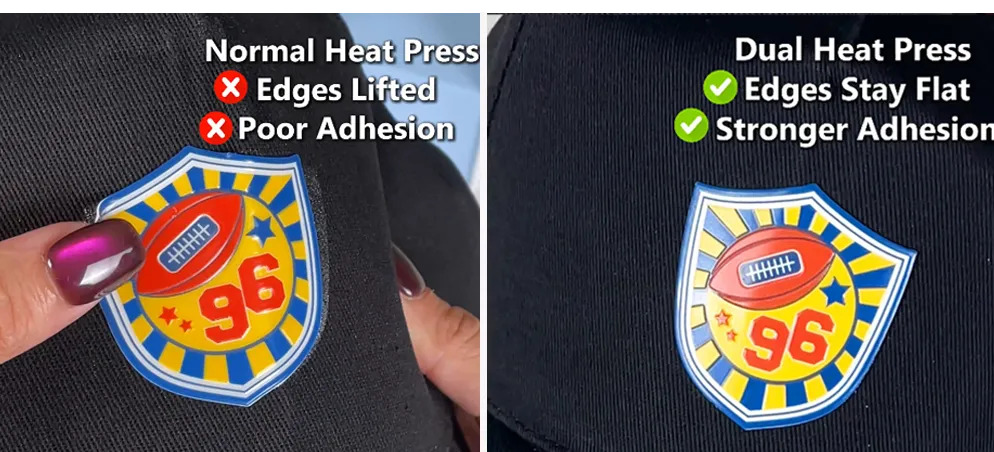
The H2C Pro solves this issue by ensuring stable heat distribution from both directions, helping every layer of the transfer fully fuse into the fabric for a more professional and long-lasting result.
This makes it ideal for:
- Custom caps
- 3D UV DTF logos
- Embroidered patches
With this top and bottom dual heating advantage, crafters can achieve stronger adhesion, cleaner finishes, and more reliable production results—especially for premium 3D decoration work.
3.Step-by-Step: How to Use the Flat Heat Press Machine?
The flat press attachment is ideal for small sublimation and 3D UV DTF projects.
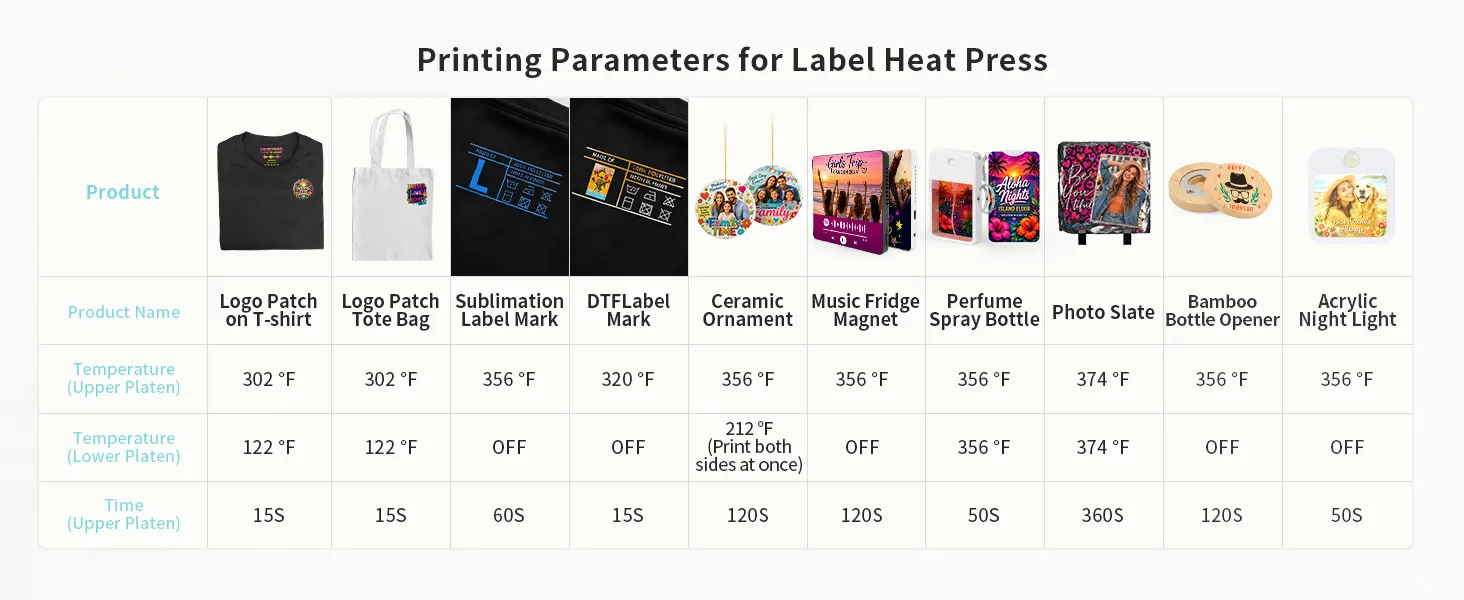
3.1.Step 1:Set Temperature and Time
Recommended settings vary depending on material:
Upper Platen
- Sublimation: 356-374°F
- DTF or UV DTF labels: 302°F–356°F
- Time: 15–60 seconds depending on transfer type
Lower Platen
- Sublimation: 356-374°F
- DTF or UV DTF labels: OFF-122°F
- Time: 15–60 seconds depending on transfer type
3.2.Step 2: Position the Sublimation Blank
Place your sublimation blank on the bottom heating plate.
Heat press use medium pressure so both plates make even contact.
3.3.Step 3: Remove and Cool
Once the timer ends:
- Remove the butcher paper using heat-resistant gloves
- Peel transfer paper according to material type
- Allow the product to cool naturally
4.How to Replace the Heating Attachment
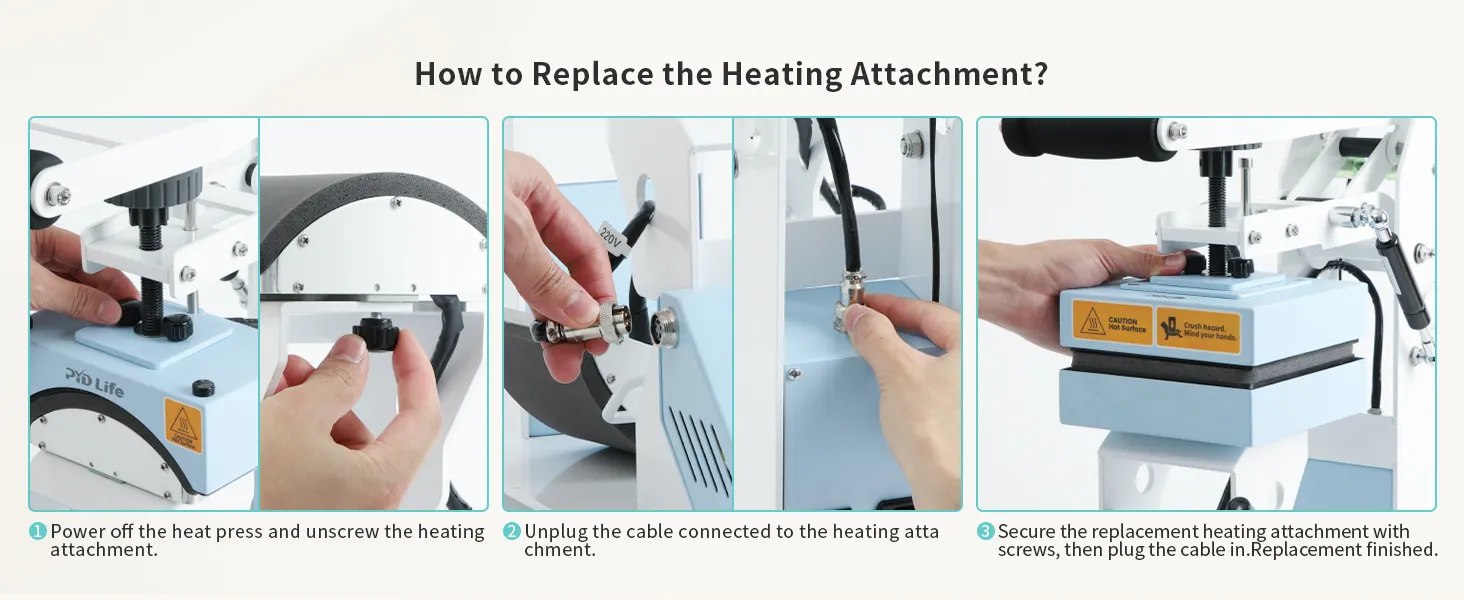
One of the biggest advantages of the H2C Pro is its interchangeable heating attachments. Switching between the flat press and hat press is quick and simple, allowing you to handle different projects with one machine.
4.1.Step 1: Turn Off the Machine
Before replacing any attachment, always power off the heat press and unplug it from the power outlet.
Allow the heating attachment to cool completely before handling it to avoid burns.
4.2.Step 2: Remove the Current Heating Attachment
Using a screwdriver, carefully loosen and remove the screws that secure the heating attachment to the machine.
4.3.Step 3: Disconnect the Cable
Locate the cable connected to the heating attachment and carefully unplug it from the control unit.
Avoid pulling directly on the wire. Instead, hold the connector firmly and disconnect it gently.
4.4.Step 4: Connect the Replacement Attachment
Take the replacement heating attachment and plug its cable into the corresponding connector on the machine.
Make sure the connection is secure before proceeding.
4.5.Step 5: Secure the New Attachment
Position the replacement attachment correctly on the machine.
Reinstall and tighten the screws to secure the attachment firmly in place.
Double-check that the attachment is stable and properly aligned before use.
4.6.Step 6: Power On and Test
Turn the machine back on and set a low test temperature to confirm the new attachment is heating correctly.
Once everything is working properly, the H2C Pro is ready for your next project.
5.Step-by-Step: How to Use the Hat Press Attachment
The cap press function is designed for curved surfaces and detailed applications.
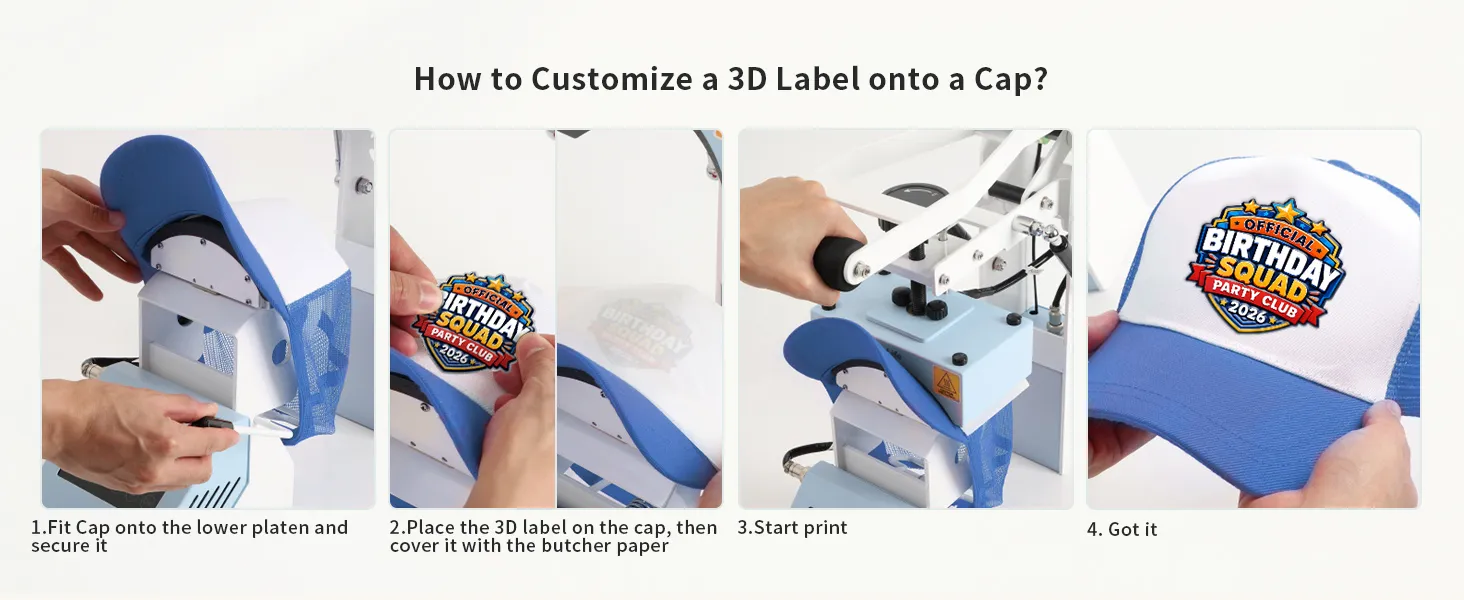
5.1.Step 1: Position and Secure the Cap
Fit the cap onto the lower platen and secure it firmly in place.
Ensure it is properly aligned and locked before pressing.
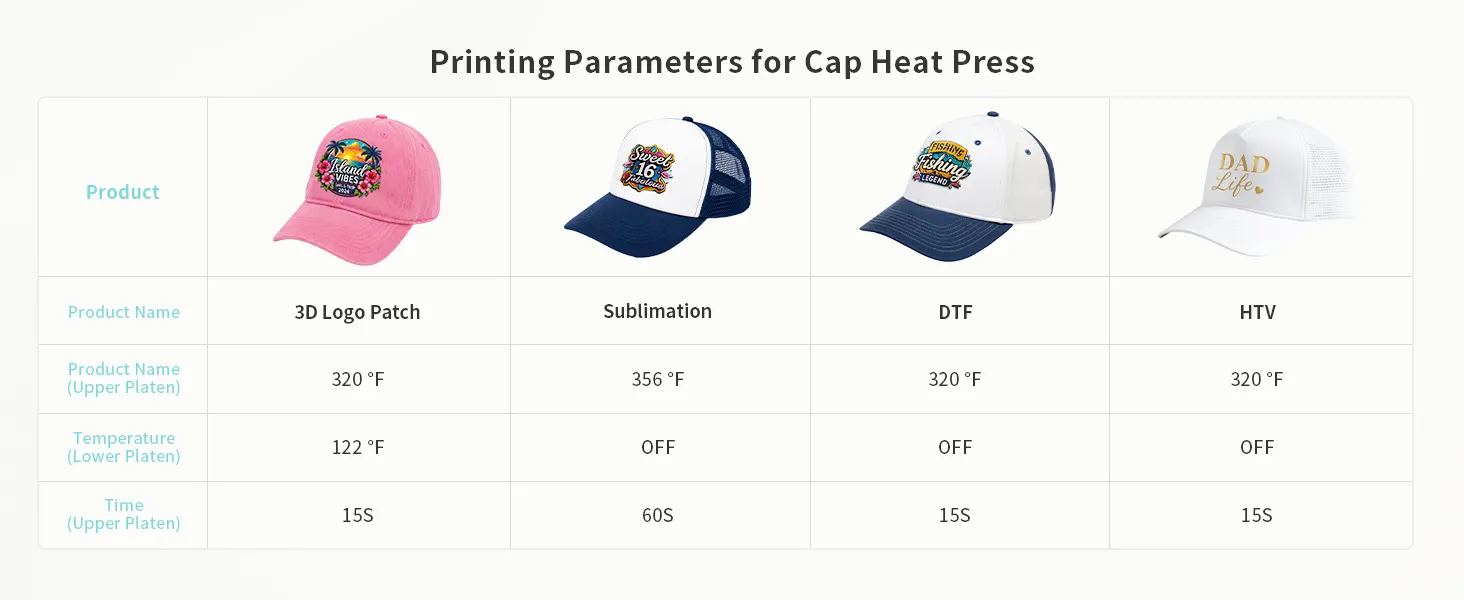
5.2.Step 2: Set Temperature and Time
Recommended settings vary depending on material:
Upper Platen
- Sublimation: 356°F
- 3D Logo,DTF or HTV: 320°F
- Time: 15–60 seconds depending on transfer type
Lower Platen
- Sublimation,DTF or HTV:OFF
- 3D Logo: 122°F
- Time: 15–60 seconds depending on transfer type
5.3.Step 3: Position the Hat
Place the cap securely onto the curved base.
Align your design carefully on the front.
5.4.Step 4: Press with Even Heat
Use medium pressure so the top and bottom heating system work together.
This dual heating ensures:
- Better adhesion
- Even temperature across curved surfaces
- Cleaner edges for labels
5.5.Step 5: Finish and Cool
Remove the hat carefully after pressing.
Let it cool naturally before handling or stretching the material.
6.Conclusion
The H2C Pro Top and Bottom 2-in-1 Heat Press Machine is designed to simplify customization while improving efficiency. Its dual heating system, compact design, and multi-application support make it a strong choice for both beginners and growing customization businesses.
Whether you're creating sublimation photo slate, personalized ornaments, or custom hat patches, this machine helps you produce clean, professional results with less effort and faster turnaround times.
Ready to take your crafting or customization small business to the next level? Don't miss the chance to upgrade your workflow with the H2C Pro. Order yours today while supplies last and start creating with confidence.
Shop now:
](https://shop.pydlife.com/products/h2c-pro-2-in-1-top-and-bottom-heat-press-machine-light-blue-110-v-mini-combo-hat-and-flat-press-machine)